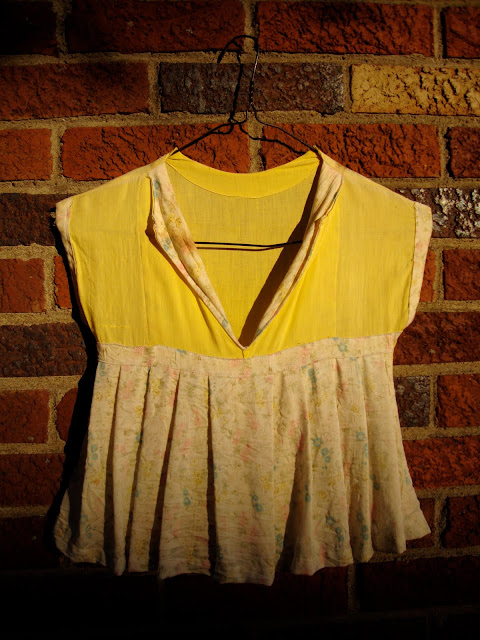
I’ve had this lovely vintage clothespin bag for a number of years. I covet it.
When Mom bought a bad, standard clothespin bag at a home improvement store this summer I was first scandalized, then reminded that I can, in fact, make pretty, functional things. I used the vintage bag as inspiration for this pattern. I made Mom’s bag out of upholstery fabric, since she wanted to be able to leave the bag outside for the summer drying season. The bag I make here is a lighter weight cotton. I think you can use whatever you want. I contemplated outdoor fabric with grommets in the bottom for drainage. The original vintage bag is a thin cotton and seems to have held up for 50 years.
You will need the pattern from Scribd.com, which I will upload this evening after Dovecake goes to bed. The bag uses 2 fabrics, one for the body of the dress and the other for the skirt, lapels and cuffs.
Cut:
Fabric A
2 Dress Pieces
1 Back lining
Fabric B
2 front lining, one reverse
1 belt
1 skirt 7.5x19
2 cuffs, 1 reverse
Pin together the necklines of the back lining and one of the dress pieces, right sides facing. Do the same with the front linings, but also pin down the inner edges. These pieces will make your lapels.
Sew the along the neckline of the back piece and the neckline and inner edges of the front piece with a ¼” seam. What you have now will look like this:
Cut down the front of the dress in between the 2 inner lining seams. Turn and press these pieces. Sew along the raw edges of linings to keep them from pulling up when your bag is in use. The back of the front piece will look like this:
Next you’re going to work on the skirt. Fold one long edge under ¼” and iron, then another ¼” and iron and stitch in place to create your hem. You can pleat it like it did, or, if you’re feeling frilly, you simply gather it. Make sure you sew the bottom hem before you pleat or gather the skirt. Fold each of the long edges of the belt under ¼” and iron. Pin the belt onto the pleated skirt edge and pin like you would bias tape. Sew the belt to the skirt along the belt fold.
Pin the skirt to the front piece making sure to center the middle pleat on the V created by your inner linings. The bottom of your skirt should be an inch or so above the bottom of the dress piece. You can also fold the longer edge of the cuff pieces under ¼” and iron and pin them onto the dress front at this point.
Sew the cuffs along the folded side. Sew the belt onto the dress along the top and bottom edges of the belt. When all the embellishments are sewn onto the front of the dress you can pin the front and back of the dress together, right sides facing, along the sides. Make sure your finished neck edges match up. Sew along each side and then pin the bottom and sew. Finish the edges with pinking shears or a zig zag stitch or a serger if you’re fancy. I’m not. I wish I was.
Turn your dress right side out and press the lapels down. I like to sew along the back neck line and sew the lapels in place. You might could use buttons to hold the lapels in place, if you’re into that sort of thing. I didn’t feel like digging for buttons, so I sewed.
I like to use a wire hanger in these things since they look more old-fashioned and cohesive with the dress bag. Place on a hanger and fill with clothespins. Ta-da! You’ve got a purdy bag for your clothes pins!


